

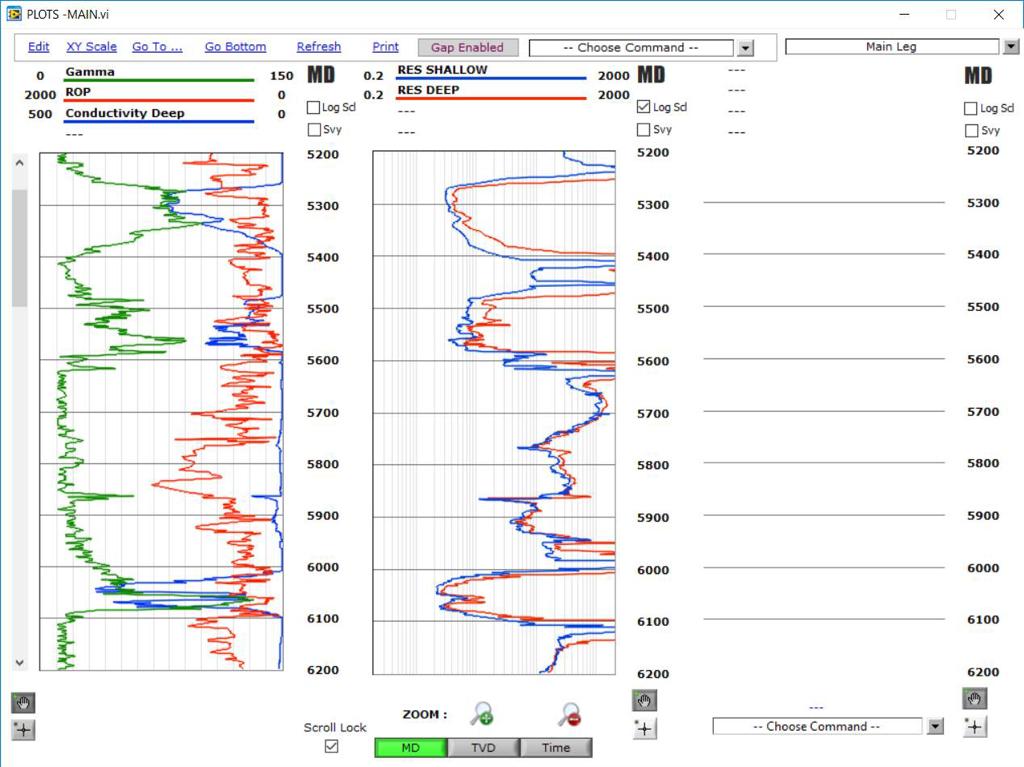
The “Conductivity Deep” plot is derived from the “Res Deep” using (1/Resistivity Deep) * 1000
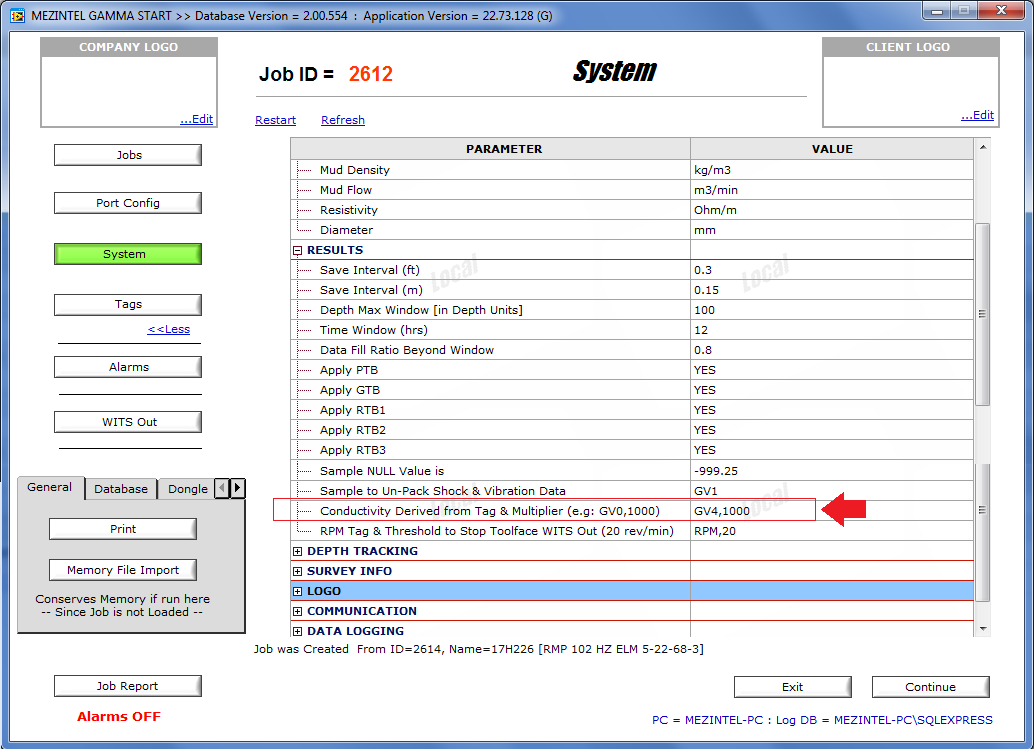
The screenshot below shows how to setup this feature in Mezintel Gamma (as of version 22.87.128).
Note that if you want to get just one Conductivity channel you will just fill in:
GV4,1000
The first entry is the channel ‘Tag name’ from which conductivity will be derived from, and the second number is the multiplier.
In the above example it means that Conductivity will be derived from GV4 as (1/G4) and that the resulting value will be multiplied by the factor of 1000.
If you want more conductivity channels you just use:
GV4,1000; GV1,1000; GV2,1000
Notice the comma and then the semi-colon delimiters. This means that the above example will derive three conductivity channels from GV4, GV1, and GV2 by getting the inverse value for those and then the result will be multiplied by 1000. So Cond1, Cond2, and Cond3 will now be active.
Thus:
Cond1 = (1/GV4)*1000
Cond2 = (1/GV1)*1000
Cond3 = (1/GV2)*1000
Again, if you just want one conductivity channel derived, then just put one entry with no semicolon separator:
E.g:
GV4,1000 . . . will mean:
Cond1 = (1/GV4)*1000
Note that the Channel Tag does not need to be GV#, it can be any other TAG name. Just be sure to use the correct abbreviated name of that TAG by getting the spelling right!
Next, Add Conductivity Tags
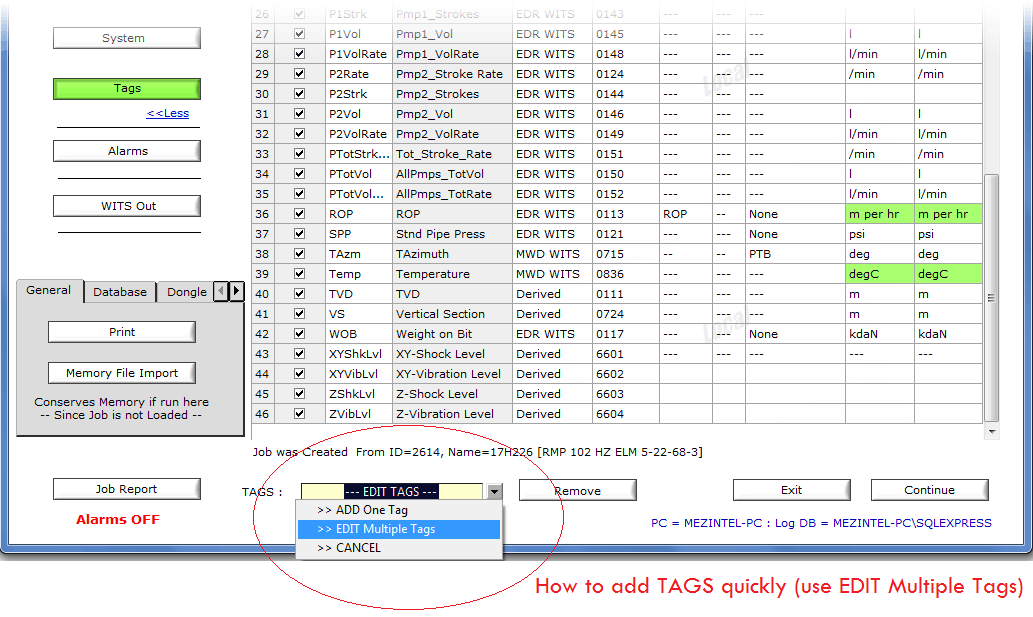
On the Tags view, you can edit multiple MWD Tags by choosing the option in drop-down menu.
Be sure to add the desired conductivity channel TAG just as shown below. It is very important to remember to use ‘Derived’ for the conductivity channel MODE setting.
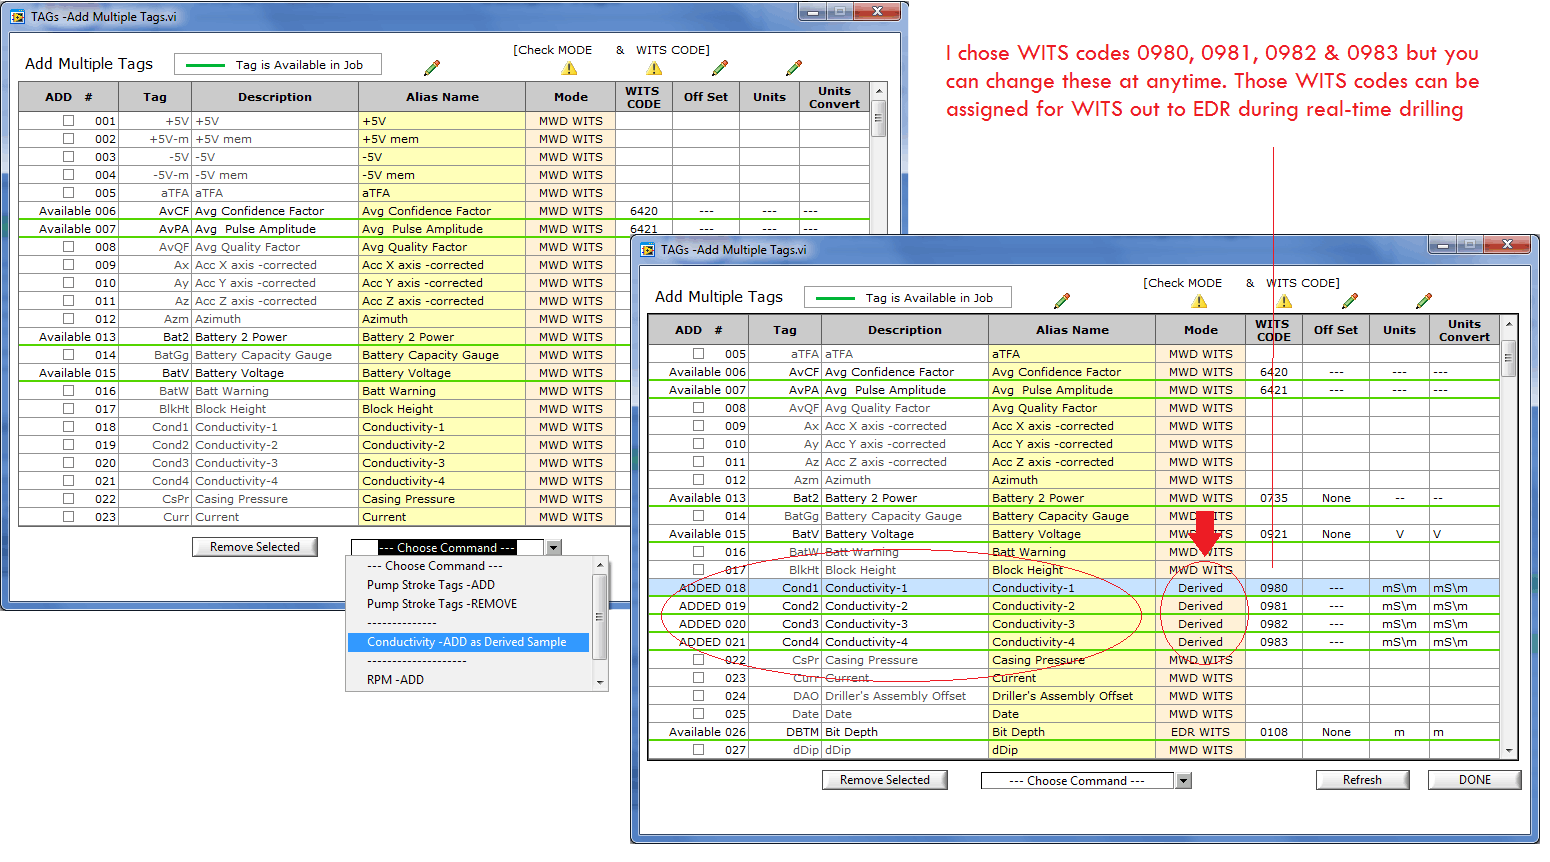
On the Add Multiple Tags window, chose Conductivity -ADD… to change the tags’ modes. Then edit WITS codes as applicable.
After that you can change the name description of the Channel. E.g: You can change Conductivity-1 to CNDCTY-01 or anything you want. That new name will appear in the PDF log Header.
… After that, each time you download LAS file, the conductivity will be derived automatically as long as you select it in the LAS sample list.
Also if you log Resistivity, conductivity will be automatically generated on the same plot.