


In LabVIEW the Enter Key Does Not Navigate to Next Data Entry Box
<Tab KEY> vs <Enter Key> Behavior in LabVIEW Forms
In a LabVIEW data entry form, pressing the <Tab Key> causes cursor navigation to next data entry box. However, pressing the <ENTER Key> on same data box only finishes data entry, and does not move the cursor to the next data entry input box. Why is this so?
In LabVIEW, one reason why the <Enter Key> does not cause cursor navigation is probably because for multi-line text boxes, the <Enter> key is used to start a new-line. However, LabVIEW text boxes can be configured to be of a single text line, such that it would be desirable for the <Enter> Key to invoke cursor navigation. Data entry staff also have same preference, that: pressing the <ENTER Key> should move the mouse cursor to the next data entry box.
Here is the property menu to make a text box carry a single line that will wrap within the text box:
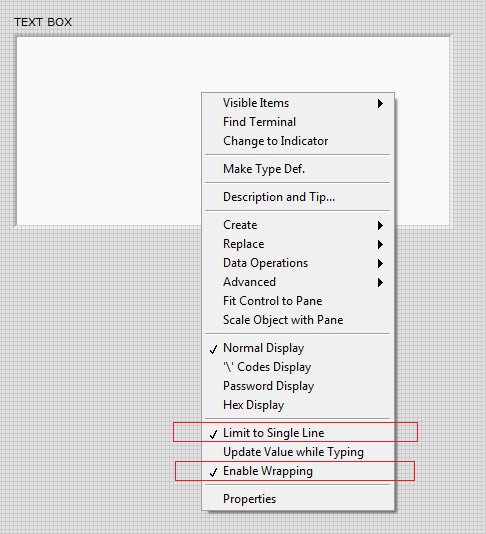 Fig 1. Property to make a LabVIEW Text box carry a single wrapping line of text.
NOTE: If there are text data boxes that need to use the <Enter key> for multi-line inputs, the solution presented here achieves this by holding <Shift Key> while pressing the <Enter Key>.
Making Enter Key Move Cursor via a Programmatic Solution of three Compact VIs
This article article shows how to get the <Enter Key> to move mouse cursor to the the next data entry box.
Here is how this tool works:
STEP 1. Design the data entry form to look as desired for reporting.
You must be sure that all data boxes are arranged in a logical manner and that you have finished the layout of controls for the entire form. Note that it is OK to mix individual data boxes and data clusters on the form. For example the report form used in this example includes numeric, string, timestamp, combo boxes, and clusters which themselves contain numeric data boxes.
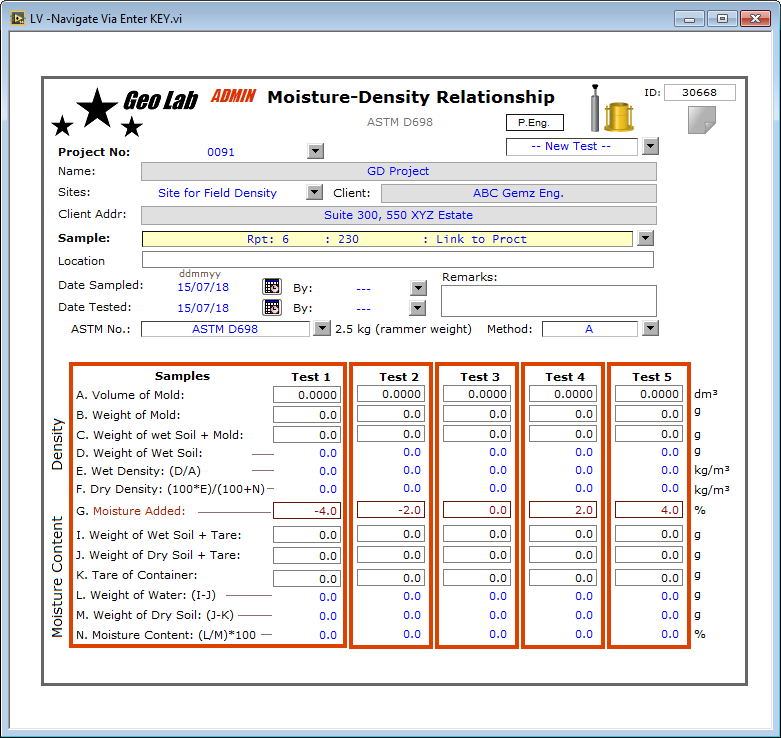
Fig 2. Test Report LabVIEW Form used in this example
STEP 2. Set Tabbing Order for Controls
To set the Tabbing order, go to the LabVIEW front panel development window and choose the menu:
EDIT >>> ‘Set Tabbing Order’.
This menu is shown here:
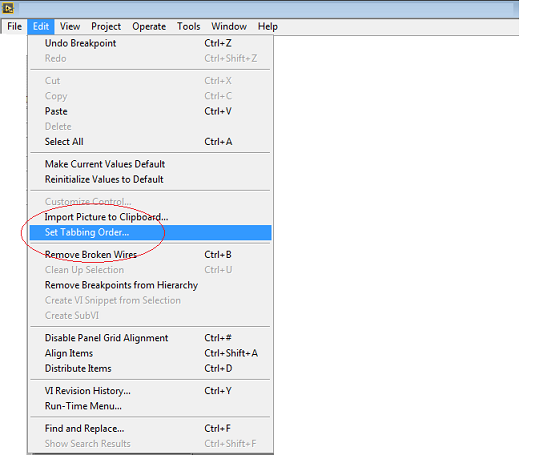 Fig 3. Menu for setting tabbing order for input data boxes.
Use this menu to launch a tool to select the order in which controls will be navigated when pressing the <Tab key>. The desired Tabbing order should also be set for data entry boxes inside the cluster objects.
In assigning tabbing order, be sure that the tab order matches the logical progression of data entry.
STEP 3. Disable Controls to be skipped
Next, disable any data boxes that will be skipped when navigating the data entry boxes on the form. Such objects can be those that auto-complete due to calculations on the form or due to auto-population of data from a database.
For example: In the form used in this demo, after you choose a Project No, data boxes for: Project description box, Client name, and Client address all auto-complete. Therefore, these three boxes are all disabled because the data entry person will not be required to entire data them. For this demo form data controls disable data boxes that are to be skipped in navigation are either colored in gray or those data boxes do not have a border around them.
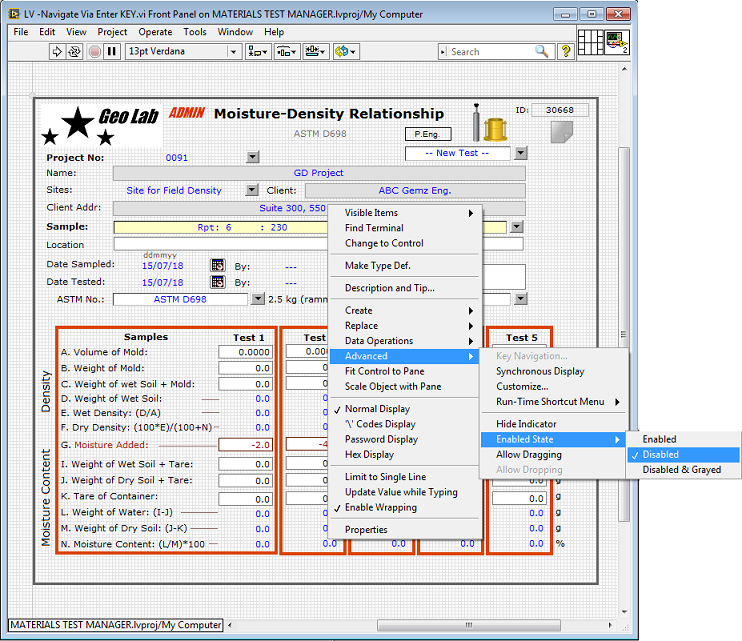 Fig 4. How to disable a control from receiving cursor focus upon navigation. Such disabled data boxes will be skipped when pressing the <Enter key>.
STEP 4. Adding LabVIEW Programming Objects to Implement <Enter KEY> navigation
There are only two VI modules that implement navigation via the <Enter Key>. These two VIs are shown in the LabVIEW block diagram attached here:
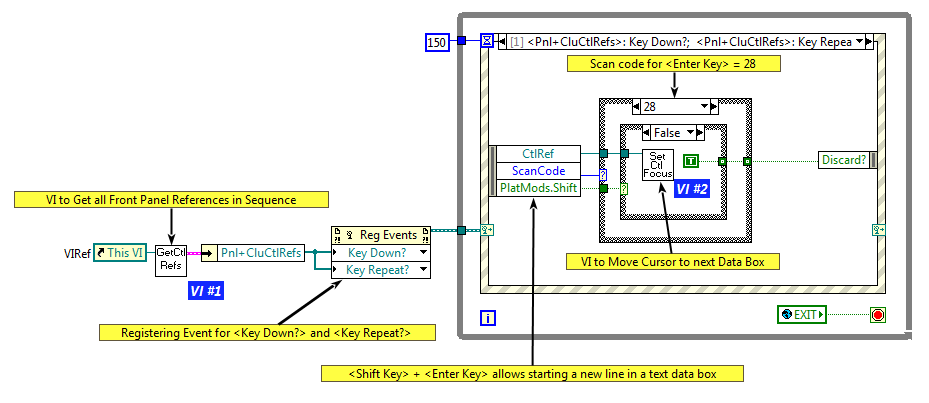
Fig 5. Two VIs, Labelled VI #1 and VI #2, for implementing navigation by <Enter Key> . The block diagram shows that array of references generated by VI #1 is use to register two user events,
namely: (1) Key Down? and (2) Key Repeat?
These two events : (1) Key down? and (2) Key Repeat? are fired each time a keyboard key is ‘pressed’ or ‘held down’. When the key pressed is of scan code = 28, which is the scan code for <Enter Key>, VI #2 will run and will move the cursor to the next data input box.
<Shift Key> + <Enter Key> allows the ENTER key to start a new line
Note that while in a Text data box, by holding down the <Shift KEY> while clicking the <Enter Key>, the code for moving the cursor will be skipped and subsequently a new line will be introduced to the text data box.
Description for these VIs and corresponding block diagrams is as follows:
1. LabVIEW VI that Gets Data Box References in the Right Tabbing Order
This VI is labelled with the numeral 1, and uses VI’s front panel reference to collect references for all data box references on the front panel. This VI checks the status of each control and throws out references of those controls whose status is ‘disabled’.
The Front Panel for VI 1 is shown here:
 Fig 6. Front Panel of VI #1. This VI collects references to all data boxes including those within clusters. Note that this VIs assigns names for data boxes within clusters separated by the Pipe ( ‘|’) sign. The name on the left is the LabVIEW cluster name and the name on the right is the data box label name.
The references are collected in a 1D array in which the sequence of references in the array matches the tabbing order of the data boxes.
Clusters objects are also considered and the data box references within the cluster objects are collected in a similar manner.
The array of references will be used in VI module 2 to capture the <Enter Key> pressed and to determine which Data box comes next for the Cursor to be moved to.
The Block Diagram for VI 1 is shown here:
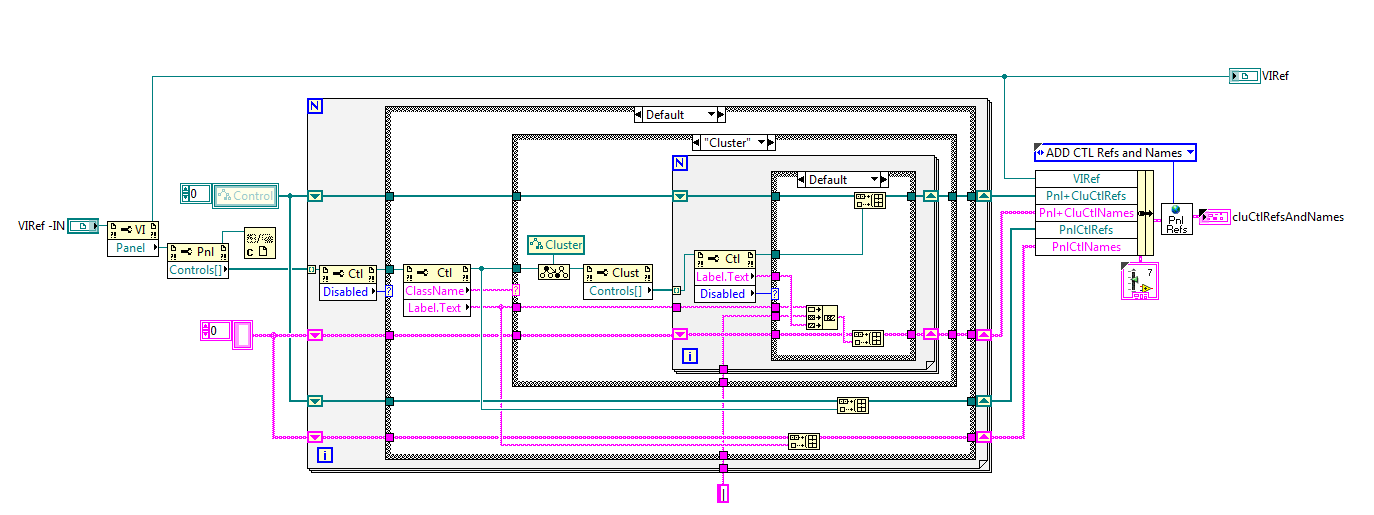 Fig 7. Block diagram for VI #1. This VI gets a collection of references for data boxes on the front panel and ignores those that are disabled. Front panel data box references appear in the same sequence as the tabbing order. This way, the array order of references determines the next data box to-go-to.
The references to to data boxes collected by VI #1 are used to create a user event on the Event structure object See block diagram) . The Event names are:
1. EVENT = Key Down? is invoked when <any Key> is pressed once and released.
2. EVENT = Key Repeat? is invoked When <any Key> is pressed and held-down.
The VI# 2 is placed under the case name for these two Events and under the CASE name for Scan Code = 28, which specifically corresponds to the <Enter Key>’s scan code.
2. LabVIEW VI that Moves Cursor, Assigns Focus, and Selects All Text of the Next Data Box
This VI is labelled on the block diagram with numeral #2, and its purpose is to move the cursor, assign focus, and select all text of the next data box.
The block diagram for this VI is shown here:
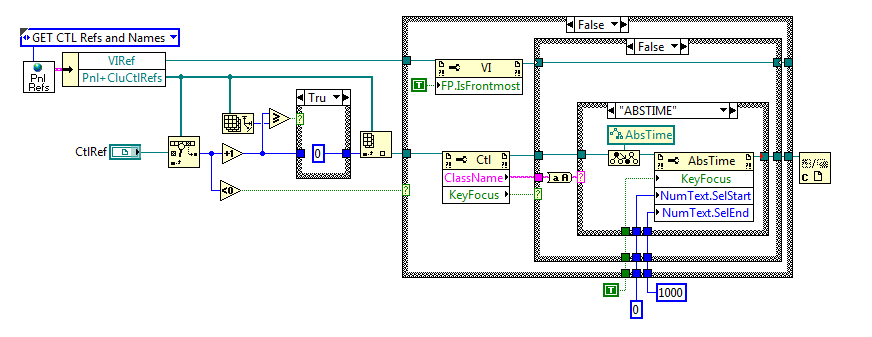 Fig 8. Block diagram for VI# 2. Its function is: To get reference for the next data box, assign focus to that data box, and select text in the data box ready for editing.
LabVIEW VI # 2 also ensures that the top level VI is front-most and active. As the iterations to move to the next data box continue, at some point, the incremented (i.e. +1) reference index will exceed the number of available references for data boxes. When this happens, VI# 2 sets the next data box to the first data box, at array index = 0; thus repeating the navigation process.