

About E-Signatures
An E-Signature stands for: Electronic Signature, and it is an image file of one’s signature that shows up on BreakTest reports after clicking the ‘Reviewed By’ check box. A user must have signatory rights for the ‘Reviewed by’ check box to appear.
An example of an electronic signature is the one shown below
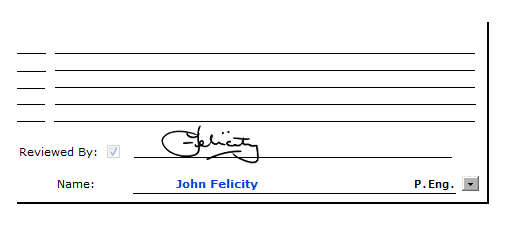
E-Signature showing on a BreakTest Report.
How to Make a Signature File
Every signatory person, needs a personal signature image file which will be called-up and placed on the report when signing.
Here are the steps to make the signature file.
STEP 1: Take a sheet of letter-size paper and get the Person to Sign
The signatory person can use a blue or black marker pen, or an ink pen, that has a solid-bold writing style. The signature should be written on portrait page layout of a letter-sized paper. See Fig. 2.
The size of the signature should extend about 2 to 3 inches across and 1 inch high. Note that, the larger the signature the better. BreakTest will reduce the signature size to fit the signature space on reports and this image size reduction improves its resolution.

Fig. 1. Signature hand-written with bold ink on letter-sized paper.
STEP 2: Photocopy the Signature Page as a PDF File
Once you have the signature on a letter-sized paper, scan the signature as a PDF file so that you now have it on your PC.

Fig. 2. Scan paper with signature as PDF file and send to PC.
STEP 3:
Open PDF file, take screenshot of the signature image, and paste signature image in Paint Brush app. See Fig. 3. below:
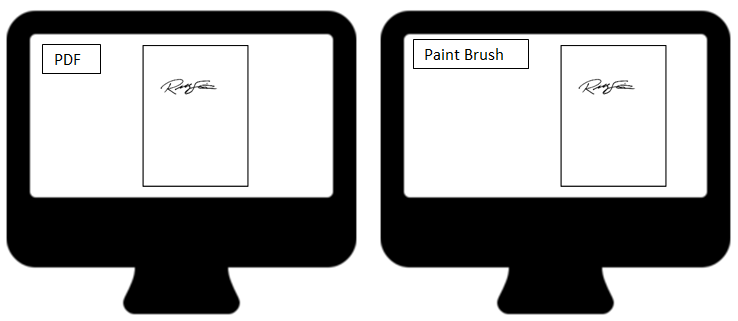
Fig. 3. Take a screenshot of signature image from PDF file and paste image in paint brush.
STEP 4:
Crop the signature so that the signature is at corner of image canvas and the signature background is same size as signature.
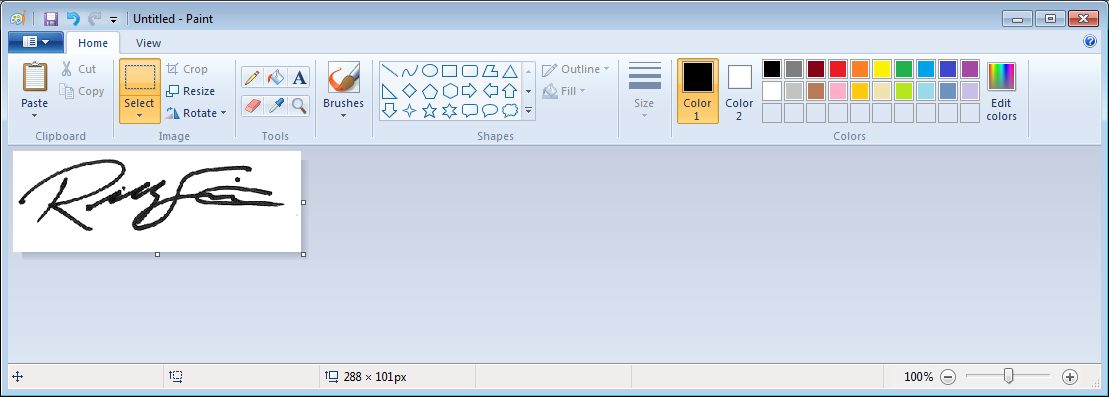
Fig. 4a. While in Paint Brush, be sure that the signature top left edge is at left edge of white background. Also, the white background must be reduced (cropped) to fit the signature size as much as possible.
** Do not leave too much extra white space.

Fig. 4b. For example, do not leave that extra space marked with the red X-lines. Make sure the extra white space is reduced to fit signature image.
STEP 5:
Save the file as a JPG and name the signature file with a special signature file naming rule as explained here.
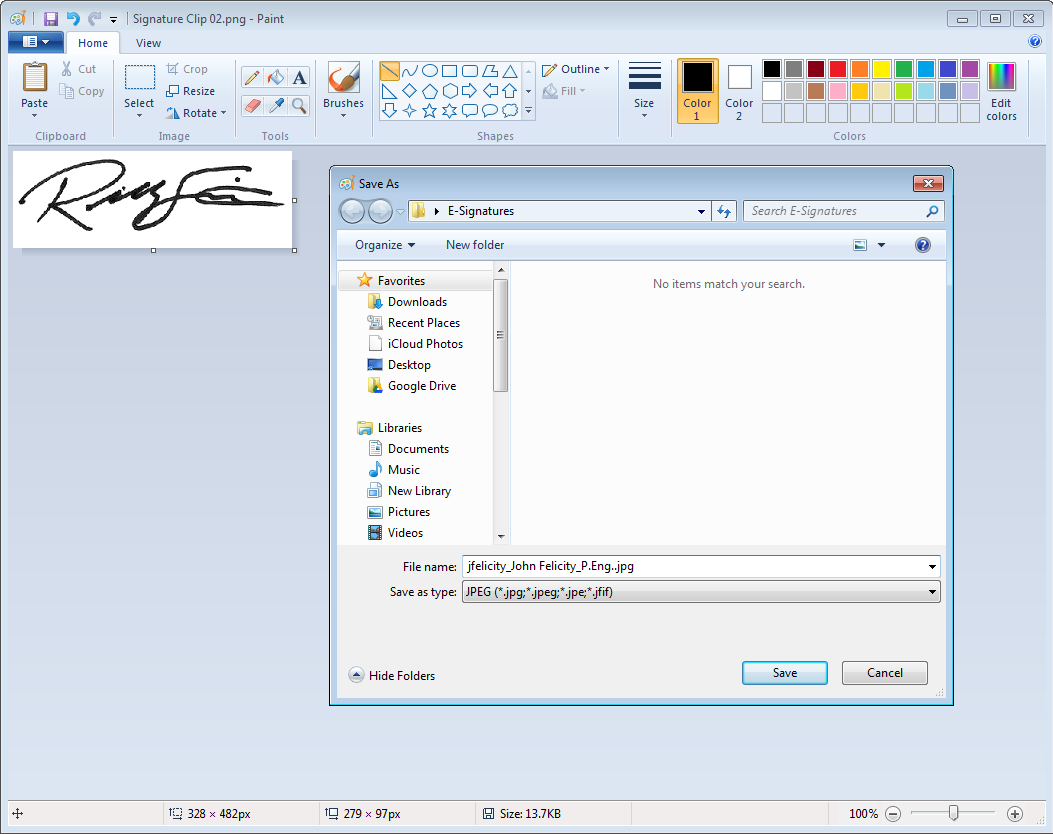
Fig. 5. Save signature file as JPG file-type and name the file by following the rules; explained in STEP 5.
Signature File Naming Rule:
This rule requires the signature file to be named as follows:
<UserLoginName>_<FirstName LastName>_<Certification>.jpg
In the above example:
- <UserLoginName> = jfelicity (this is the BreakTest login name. It is not case sensitive)
- <FirstName LastName> = John Felicity (First Name and Last Name)
- <Certification> = P.Eng. (Signatory’s Certification Title)
Thus, the signature example file is named as:
jfelicity_John Felicity_P.Eng..JPG
NOTE: Notice the double dot towards the end of the file name above. One dot belongs to the ending title: Eng. And the next dot is the start of the file extension: .jpg. Together, those two dots show up as ‘…Eng..jpg’
What to do if Signatory Person Does not Have a Certification Title
If signatory does not have a certification title, just add the underscore but do not add anything else after that. For example:
jfelicity_John Felicity_.jpg
In the above example, the signatory does not have any certification title. Notice that the underscore still comes after the last name and the file extension (.jpg) comes right after the underscore.
STEP 6: Putting Signatures Files in the Right Location
Once you have covered and finished Steps 1 to 5, you will end up with a signature file on your computer. This signature file needs to be saved in two (2) separate locations:
LOCATION 1: Save Signature File to safe Folder on Signatory’s PC
The first location is a folder path on the Signatory’s PC. For example you have the signature file named: jfelicity_John Felicity_P.Eng..jpg
Copy this file to a thumb drive and take the thumb drive to John Felicity’s PC, and save it at a known folder location. The known signature folder location can be anywhere safe (e.g: where it will not get deleted by mistake). In this example we have saved the Signature file in the location:
C:\BreakTest\MySignature\jfelicity_John Felicity_P.Eng..jpg
After saving the file on the Signatory person’s PC local drive, call-up the file by visiting the following menu: See Fig. 6A.
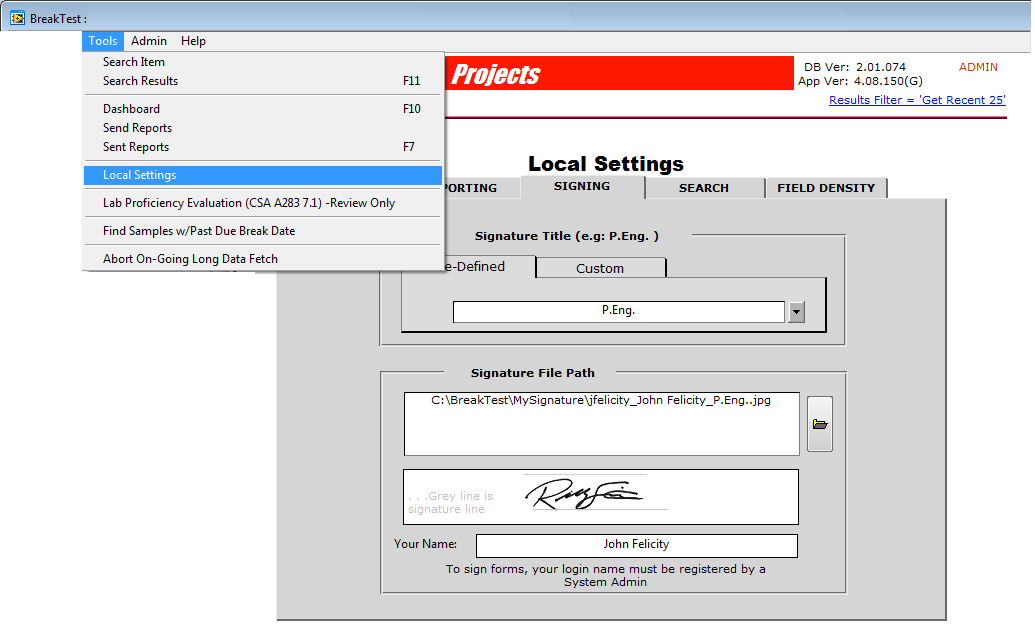
Fig. 6A. Signature file called-up in BreakTest from known PC local folder so that it shows in signature box. Also, while here, be sure to fill-in the certification title and person’s full name as shown above. Notice that the signature image will be re-sized to fit the space allocated for the signature.
LOCATION 2: Save Signature File to a Server Folder assigned by IT Person
The second location is a folder path on a network server that is assigned by your IT person. This network path can be found from the BreakTest division customization screen. See Fig. 6B.
Copy the signature file to this server location. To open that server folder you can copy the above path to your Windows Explorer file address bar.
You will see other signature files there. Just copy and paste the new signature file at that server location. This file will be used by BreakTest when doing daily signing of Master PDF reports.
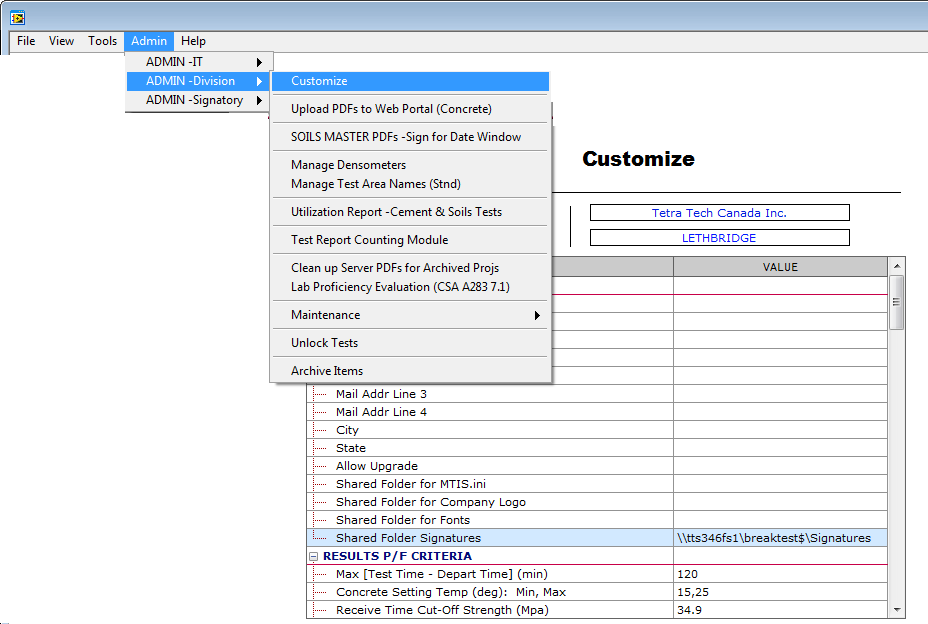
Fig. 6B. This is the second location for the signature file. You can find out the folder location by visiting the Division configuration screen as shown above. Note that you must have BreakTest Admin rights to be able to see this configuration screen.
Step 6 concludes the procedure for adding a new e-signature file for use in BreakTest. The following STEP 7, is for verification of signature files on network file server.
STEP 7: Check to see what signature files are on network Drive
You can verify the list of signature files on the network file server by visiting the division customization settings and, next to the Shared Folder Signatures setting, click on the button labelled as …. A window will open that will show signature files as shown in Fig. 7A.
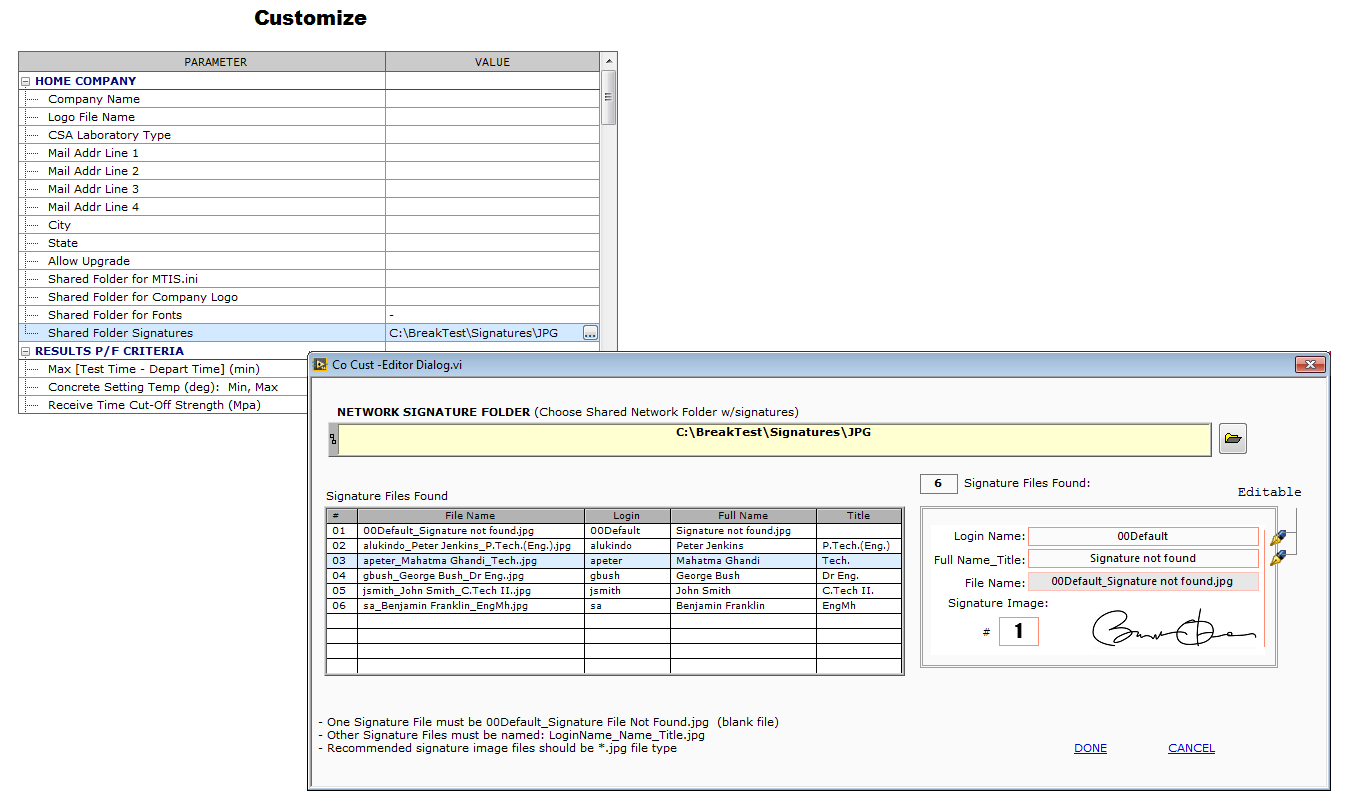
Fig. 7A. Clicking on the button (…) from Division customization screen will show the signature list on the server side. Note that from this utility you can edit the <Login Name> & <FirstName LastName>_<Title> and the file name will be corrected accordingly.
Check for valid Signatory Signature File:
Check the following to be sure that the signatory person has a valid signature file:
- File name must start with login name which is the same as the BreakTest login name used by the signatory person (login name is not case sensitive).
- File name must show signature in the signature image box.
- Signatory persons full name should be a valid one (This is case sensitive)
- Signatory persons certification title should be a valid one or can be blank.
To find out the signatory’s BreakTest login name, you can open a soils form signed by the Signatory person and scroll to the right to see the ‘Signed : Date’ column.
In Fig. 7B, the signatory login is sa. (see the ‘Signed : Date’ column)
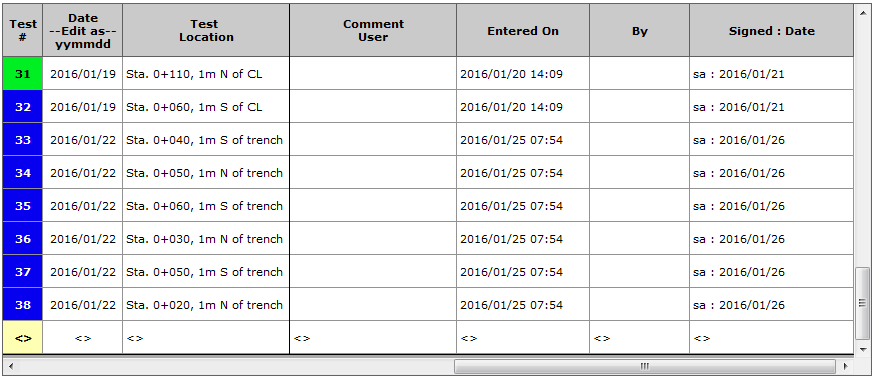
Fig. 7B. Scrolling to the right to see the signatory persons login name. In the above example, the signatory persons login name is “sa” (as seen from the ‘Signed : Date’ column)